-
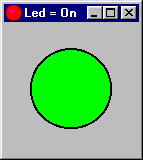
LED.
This component can be connected to every pin of the
simulated 68HC11. The LED will display the current state of the pin.
You can choose your own color and title. If you minimize the window you can
still see the state of the led.

|
 |
-
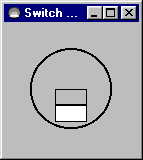
Switch.
This component can be connected to every pin of the simulated 68HC11. The
pin can be driven by the switch. You can choose your own color and title.If
you minimize the window you can still see the state of the switch. The switch
can be toggled by using the system menu. (You enter this menu by clicking
the icon.)

|
 |
-
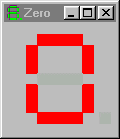
7 segment display (with decimal dot).
This component can be connected to 8 pins of the simulated 68HC11. Each pin
drives one of the segments of the display. You can choose your own color
and title.
|
 |
-
Hex 7 segment display.
This component can be connected to 4 pins of the simulated 68HC11. The state
of these 4 pins together is displayed as one hexadecimal digit on the
7 segment display. You can choose your own color and title.
|
 |
-
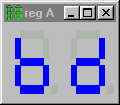
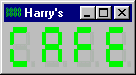
Byte 7 segment display.
This component consists of two coupled 7 segment displays. This component
can be connected to every internal byte of the simulated 68HC11. E.g. register
A, IO register PORTA or memory location $3000. You can choose your own
color and title.
|
 |
-
Word 7 segment display.
This component consists of four coupled 7 segment displays. This component
can be connected to every internal word of the simulated 68HC11. E.g. register
SP (the stackpointer) or timer register TCNT. You can choose your own
color and title.
|
 |
These components were originally designed by Alex van Rooijen. Alex also
designed the way in which the THRSim11 program communicates with these components
via the standard windows COM protocols.
Harry Broeders did a complete
redesign of these components to make them more robust and more friendly to
use.