© Patrick Koorevaar, Bart Grootendorst, and Harry Broeders.
SetCompWinTitle and
SetCompWinIcon be used in a component without a window?
TValidator object doesn't contain any text when you enter a
wrong value in an input dialog box? (Borland C++ specific)
SetCompWinTitle and SetCompWinIcon
be used in a component without a window ?
HICON
or LPCSTR. detVoltageAcrossRx() that determines the voltage across
a resistor Rx. What we want is that the voltage across Rx is send out (via
pin out0) immediately after connecting the component with the
THRSim11. The body of the constructor must then contain the following line:
out0.set(detVoltageAcrossRx());
Run the InstallShield Express program after you've installed it from the
Borland C++ CD-ROM.
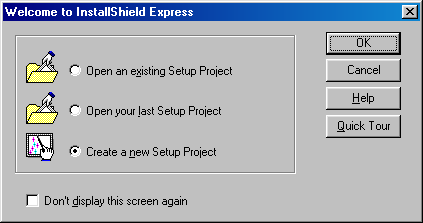
Select: Create a new Setup Project
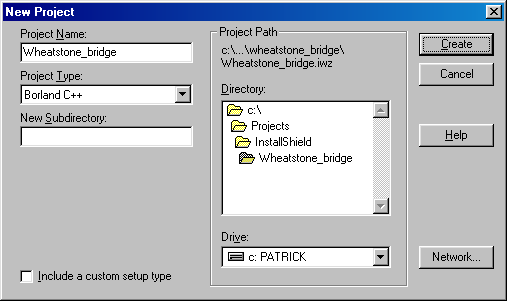
Enter your Project Name and select your Project Path (InstallShield
will create your setup files there)
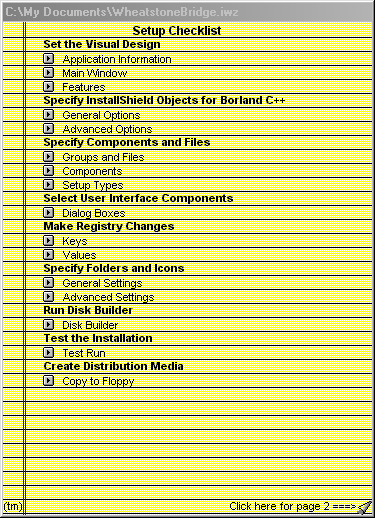
Now you'll see the Setup Checklist. Click on the grey buttons to the
left of each item to modify it.
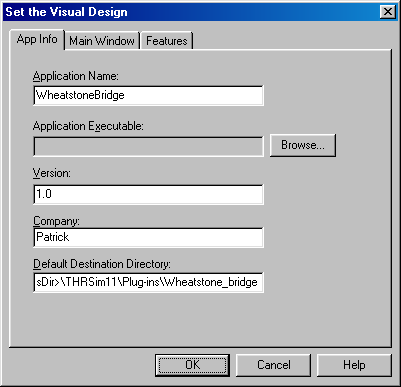
After you've clicked on the button next to Application Information,
you'll see this window. Enter the information of your program here. Notice
that you must type the path name <ProgramFilesDir>\THRSim11\Plug-ins\
in the Default Destination Directory input box followed by your component
name, to be sure your component will be noticed by the THRSim11 (you can
however install your component in an other directory, as long as the registry
key is pointing at that directory, but it's better if you don't.)
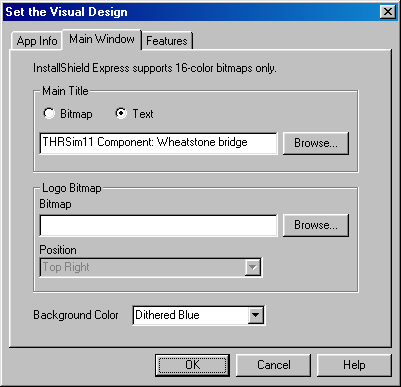
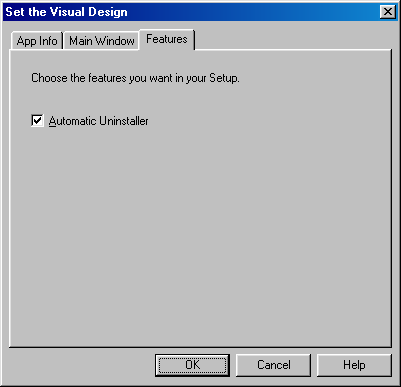
Edit the other two tab sheets of Set the Visual Design as shown in
the pictures above.
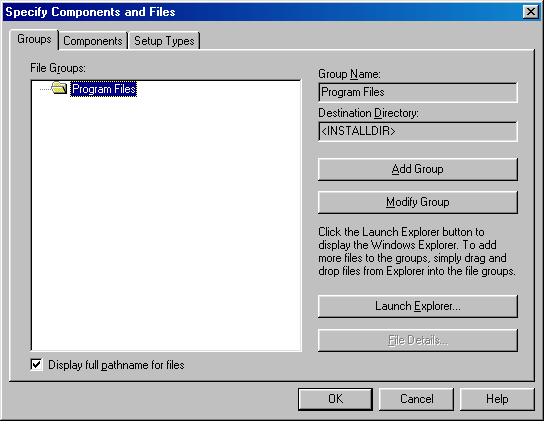
The Specify InstallShield Objects for Borland C++ section can be skipped
if you don't make use of any special libraries (the RTL:dynamically
linked, OCF: linked and embedded and OWL:dynamically linked
libraries are already installed by the THRSim11). So we go to the Specify
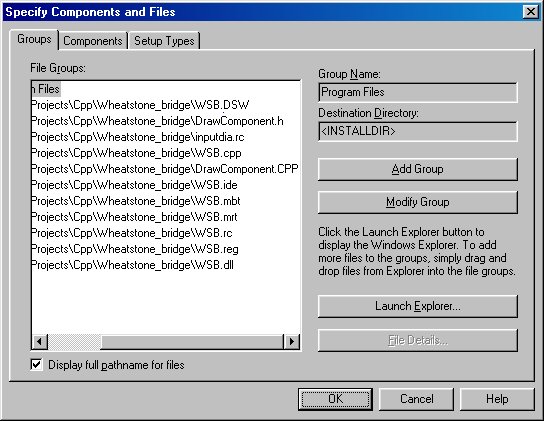
Components and Files section. Here you can select the files which you
want to be included in the install project. The essential files you need
to select are shown in the picture below (select all the *.dsw, *.h, *.rc,
*.cpp, *.ide, *.reg and *.dll file types you made or modified) The easiest
way to include them in your project is with the windows explorer, so click
on the Launch Explorer... button. After you've selected the
files you can drag them to the InstallShield window and drop them in the
File Groups: section of the window.
No changes have to be made to the Group Name and Destination
Directory, the Components sheet and the Setup Types
sheet can also be left unchanged.
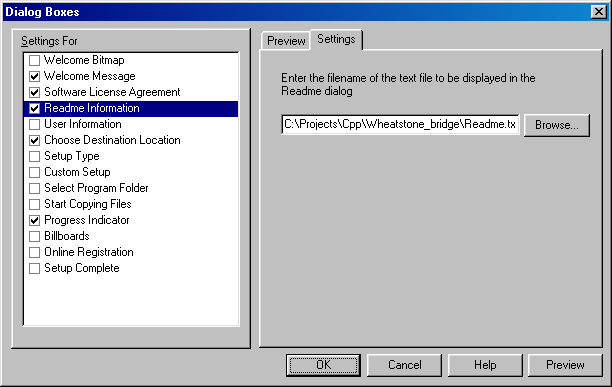
At this point you can setup the type of dialog boxes the setup program will
display. In the picture above you'll see the most appropriate dialog boxes
selected to get a simple and effective setup program, but of course if you
want to you can select other dialog boxes as well. The only thing left to
do is to select the readme and license text-files by selecting the
Settings sheet in the Readme Information and Software License
Agreement options (you can see this also in the above picture).
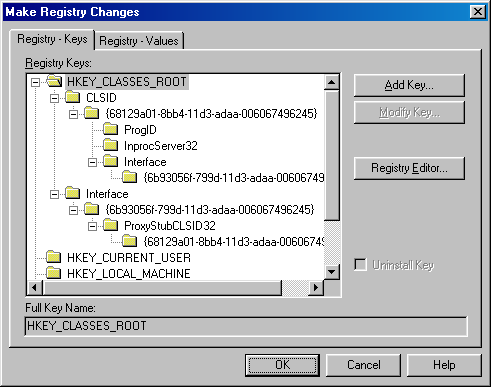
Now we are ready to add the registry keys. Click on the Keys option
in the Make Registry Changes section. The next window appears:
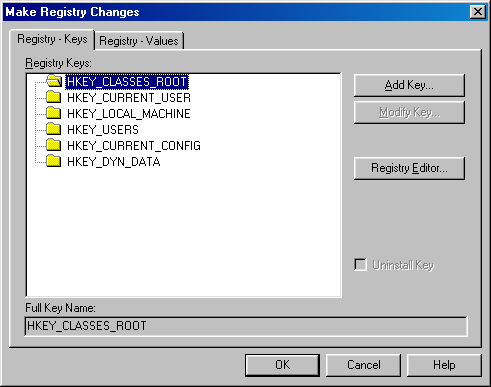
You must now click on the Add Key... button, to add a registry
key.
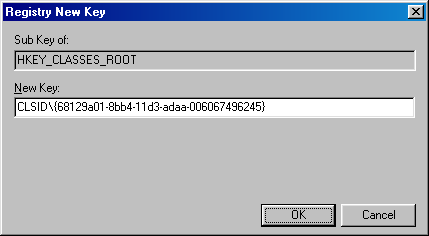
Enter the registry key in the field below New Key:.
After you've add the key, you must give the key a value. Select the key (in
our case the {68129a01-8bb4-11d3-adaa-006067496245}-key) and then select
the Registry - Values sheet.
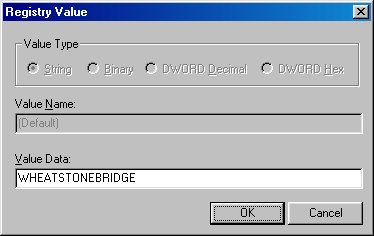
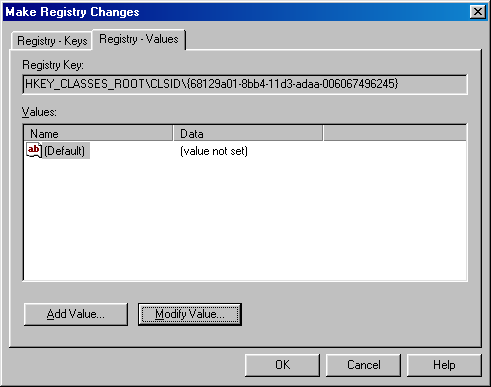
Click on the Modify Value... button and type the value of the
key in the field below Value Data. Insert the remaining keys
(Click here to see what keys need to be added
to the registry) in the same way. After inserting all the keys the Registry
- Keys sheet must now look something similar like the next picture.
Because we don't have to specify folders and icons (this is because our program
isn't a stand alone program) we can skip this section and run the disk
builder.
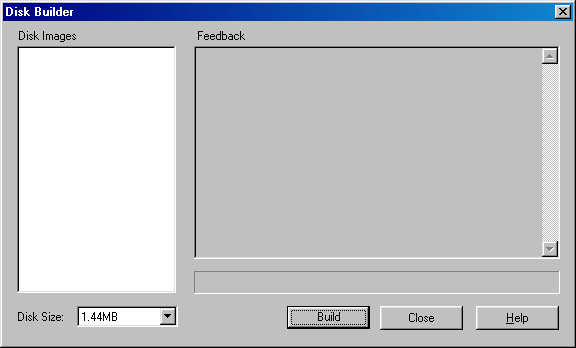
After we've runned the disk builder we can test the installation by clicking
on the Test Run command. If everything went smoothly, your component
is now ready to be distributed.
Back to top
SetupWindow() memberfunction of the TWindow
class, this can be done by overriding the function. SetBkgndColor(TColor::LtGray);
Parent->SetBkgndColor(TColor::LtGray);Parent pointer is used to set the background color of the parent
window. In this example the background color will be light gray
(LtGray).private:static int number_of_components_started;
After that we have to initialize (outside the class) the static variable
like this:
int number_of_components_started = 0;
Next we have to make some adjustments to the CreateComponentWindow
memberfunction:
HWND Component::CreateComponentWindow(HWND parent) {if (ComponentWindow==0) {++number_of_components_started;ComponentWindow = new MyComponentWin(/*...*/);ComponentWindow->Create();ostrstream o;o<<"My Component ("<<number_of_components_started<<")"<<ends;SetCompWinTitle(o.str());}return ComponentWindow->GetHandle();}
If you want to make a component without a window and a component counter
in the title, you'll still have to override the
CreateCompomponentWindow memberfunction but we don't
let it create a window:
HWND Component::CreateComponentWindow(HWND parent) {++number_of_components_started;ostrstream o;o<<"My Component ("<<number_of_components_started<<")"<<ends;SetCompWinTitle(o.str());return 0;}
void ComponentWindow::CmRestoreWSize() {TRect wr(Parent->GetWindowRect());
TRect pr(Parent->Parent->GetWindowRect());
TRect cr(Parent->GetClientRect());
int hMarge(wr.Width()-cr.Width());
int vMarge(wr.Height()-cr.Height());
int x(wr.left-pr.left-2);
int y(wr.top-pr.top-2);
TRect r(x, y, x+hMarge+WIDTH, y+vMarge+HEIGHT);
Parent->MoveWindow(r, true);
}
Where the WIDTH stands for the (ideal)
width of your component window and the
HEIGHT stands for the (ideal) height
of your component window.
Back to top
TRangeValidator
class:
// work-around to call TRangeValidator from DLLclass TDLLRangeValidator: public TRangeValidator {public:TDLLRangeValidator(long min, long max): TRangeValidator(min, max) {}virtual void Error(TWindow* p) {ostrstream message;message<<"Value is not in the range "<<GetMin()<<" to ";<<GetMax()<<".";<<ends;p->MessageBox(message.str(), "Range Error",MB_OK|MB_ICONEXCLAMATION|MB_APPLMODAL);}};
You can use this class instead of the TRangeValidator class
in the same way you would use the TRangeValidator class.
Back to top